Last Updated on June 13, 2025 by Kravelv Spiegel
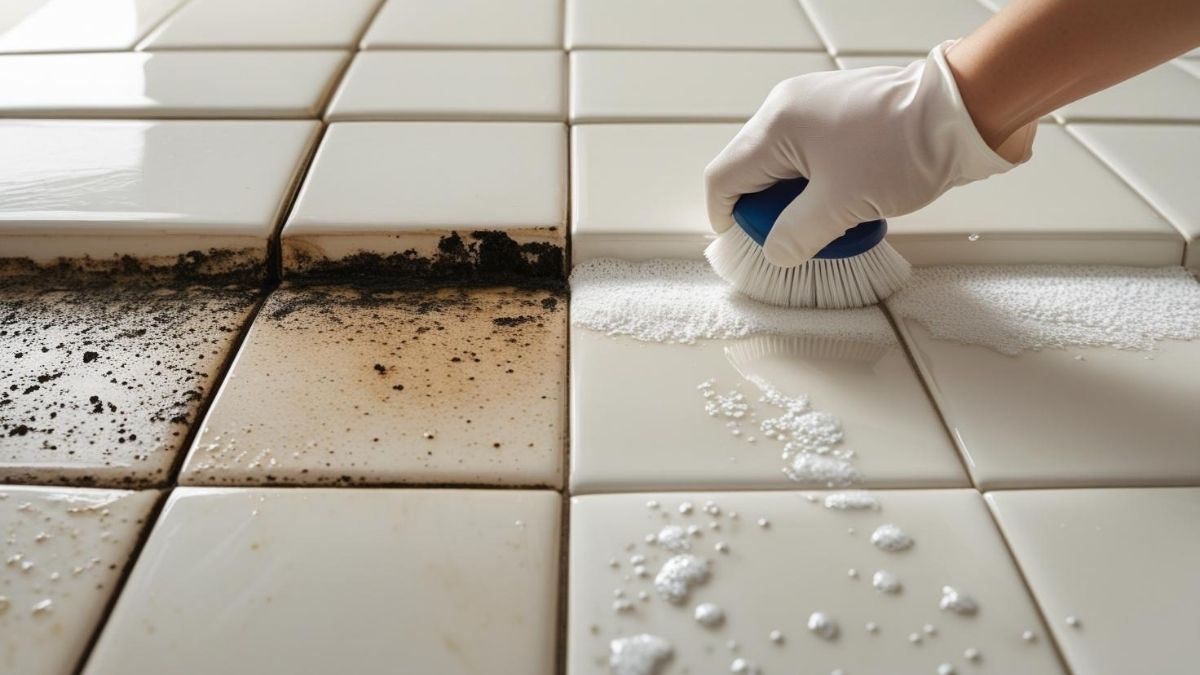
Grout may not get much attention until it turns from bright white to dingy gray. It’s one of those quiet offenders that makes clean spaces feel dirty. The best way to clean grout between tiles isn’t just about appearance; it’s about hygiene, longevity, and protecting your tile investment. Whether you’re dealing with a little discoloration or full-blown grime, getting grout back to looking fresh is more doable than most people think.
💡Key takeaways:
- Grout gets dirty quickly due to its porous nature, absorbing moisture, dirt, and bacteria.
- Several cleaning methods—from natural remedies to commercial products—can effectively remove grout stains.
- Using the correct tools and understanding your tile material is essential to avoid damage and get better results.
- Regular maintenance and sealing help keep grout clean and reduce the need for intensive scrubbing.
Understand why grout gets dirty in the first place
Grout is naturally porous, which means it absorbs everything it comes into contact with. Water, soap residue, dirt, grease, mildew, and bacteria seep in over time. In kitchens, grout traps food particles and cooking oils. In bathrooms, it holds onto moisture, mold spores, and hard water deposits. Humid environments only speed up the buildup.
If your grout is not sealed, or if the sealant has worn off, this accumulation happens even faster. Knowing this helps you not just clean it, but also prevent future stains.
Prep your workspace before you start cleaning
Before diving into any cleaning method, get the area ready:
- Remove any loose dirt or debris with a vacuum or broom.
- Mop the area to lift surface-level grime.
- Ensure proper ventilation by opening windows or turning on a fan.
- Wear gloves to protect your skin.
- Test any cleaner in a small, hidden area to avoid damage.
Also, identify your tile material. Vinegar and bleach are fine for ceramic and porcelain but can damage natural stone like marble or slate. Always double-check before applying any solution.
Use a baking soda and vinegar paste for light stains
This combination is ideal for mild to moderate grout discoloration and works well in kitchens or bathrooms that see regular maintenance.
What you need:
- Baking soda
- White vinegar
- Water
- Spray bottle
- Grout brush or old toothbrush
Steps:
- Mix baking soda with water to form a paste.
- Apply the paste directly onto the grout lines.
- Fill a spray bottle with equal parts white vinegar and water.
- Spray the solution over the baking soda paste. It will start to fizz.
- Wait 5 to 10 minutes.
- Scrub the grout in circular motions.
- Wipe clean with a damp cloth.
Good to know: Avoid this method on natural stone tiles. The acidity of vinegar can etch and dull the surface.
Try hydrogen peroxide and baking soda for deeper stains
When vinegar doesn’t cut it, hydrogen peroxide adds an extra punch. This combo tackles mildew, grime, and more stubborn discoloration.
What you need:
- Baking soda
- Hydrogen peroxide (3% solution)
- Grout brush
Steps:
- Mix baking soda and hydrogen peroxide into a thick paste.
- Apply generously to stained grout lines.
- Let it sit for 10 to 15 minutes.
- Scrub thoroughly.
- Rinse with clean water.
Hydrogen peroxide acts as a mild bleach without the toxicity of chlorine-based products. It also has antifungal and antibacterial properties.
Use oxygen bleach for heavily soiled grout
Oxygen bleach is a more powerful option that remains gentle on tile surfaces. It lifts deep stains without producing strong fumes.
What you need:
- Powdered oxygen bleach (like OxiClean)
- Warm water
- Bucket or spray bottle
- Grout brush
Steps:
- Dissolve the bleach in warm water following the package instructions.
- Pour or spray the solution onto the grout lines.
- Let it soak for 10 to 20 minutes.
- Scrub and then rinse thoroughly.
Pro tip: Don’t let it dry completely before scrubbing. For severe buildup, a second round may be needed.
Use a steam cleaner for a chemical-free method
Steam is effective for people looking to avoid chemical cleaners altogether. It kills mold, lifts stains, and works well for bathrooms or floors with dense tile coverage.
What you need:
- Handheld or upright steam cleaner with grout nozzle
- Microfiber cloth
Steps:
- Fill your steam cleaner with water and allow it to heat up.
- Use the pointed attachment to direct steam into grout lines.
- Wipe loosened grime away with a microfiber towel.
- Repeat in problem areas as needed.
Steam works well in tight corners and small crevices where brushes can’t reach.
Use a commercial grout cleaner for quick results
If you’re short on time or dealing with serious stains, commercial cleaners offer a fast solution. Popular options include Zep Grout Cleaner, Soft Scrub with bleach, and CLR Bath & Kitchen Cleaner.
What you need:
- A trusted grout cleaner (check for stone-safe formulas if needed)
- Gloves
- Grout brush
Steps:
- Read the product label carefully.
- Apply as directed.
- Allow the cleaner to sit for the recommended time.
- Scrub and rinse thoroughly.
Caution: Always work in a ventilated area and avoid mixing different cleaning products. Some cleaners contain strong chemicals that could harm tile finishes.
Use chlorine bleach as a last resort
Chlorine bleach is highly effective but can damage grout over time. Only use it on white grout that is heavily stained or moldy.
What you need:
- Chlorine bleach
- Water
- Gloves
- Grout brush
Steps:
- Mix bleach with water in a 1:5 ratio.
- Apply carefully to the grout lines.
- Scrub after letting it sit for five minutes.
- Rinse thoroughly and dry with a towel.
Important: Never use bleach on colored grout or natural stone. It can cause permanent discoloration and erosion.
Take steps to preserve clean grout
Once you have restored your grout, take these steps to keep it clean:
- Seal the grout. Apply a penetrating grout sealer every 6 to 12 months. It helps block moisture and dirt from getting in.
- Wipe down tiles after use. In showers and bathrooms, a quick towel-off prevents soap scum and mildew.
- Use floor mats. In high-traffic areas, rugs or mats reduce the dirt tracked onto grout lines.
- Avoid harsh cleaners. Stick with pH-neutral solutions to preserve the grout sealer.
- Vacuum and mop regularly. Keeping the surface clean will prevent residue buildup.
Use the right tools for better results
Cleaning grout is not just about the solution you use, but how you apply it.
- Grout brushes are stiffer and more effective than regular toothbrushes.
- Toothbrushes can work for small or delicate areas.
- Scrub pads add extra abrasion for tough grime.
- Microfiber towels are ideal for wiping up residue without scratching tile surfaces.
Investing in proper tools makes the job easier and more effective.
Avoid common grout cleaning mistakes
Plenty of myths and bad advice float around. Here are a few to avoid:
- Don’t rely on bleach for everything. It may whiten grout temporarily but damages it long term.
- Avoid vinegar on natural stone. Acidity eats away at stone tiles.
- Don’t skip rinsing. Leftover cleaner will attract more dirt.
- Grout pens aren’t cleaners. They only cover stains. They don’t remove them.
Know when it’s time to regrout
Sometimes, cleaning won’t fix the problem. If your grout is cracked, crumbling, or stained beyond saving, it might be time to regrout.
Signs to watch for:
- Missing sections
- Constant mildew despite cleaning
- Discoloration that returns quickly
Regrouting is more work but can dramatically improve the look and hygiene of your tiled areas.
Frequently asked questions
A mix of baking soda and hydrogen peroxide is one of the most effective homemade solutions for cleaning stained grout.
Yes, vinegar can damage natural stone tiles and weaken unsealed grout if used repeatedly. It’s best for ceramic or porcelain tiles.
Light cleaning can be done weekly, but deep cleaning every 3–6 months helps prevent heavy buildup and staining.
Yes, sealing your grout after cleaning helps protect it from moisture, dirt, and future stains, especially in high-traffic or wet areas.
If grout is cracked, crumbling, or moldy despite cleaning, it’s time to remove and replace it for both appearance and hygiene.
Final thoughts on cleaning grout effectively
Grimy grout doesn’t have to be the price of tiled floors or walls. With the right strategy, starting with smart, safe methods and scaling up only when needed. Choose your approach based on the mess, seal your work to protect it, and stay ahead of future buildup. Clean grout doesn’t just look good, it’s a small win that makes your whole space feel better.